Manual Testing Guide
By following this guide, you will be able to test all the significant elements of the application. All of the files required for testing are in the repository under “source/test_resources”.
Testing Projects
Project Creation
When you start up the application, you should see a landing page with a button for adding a new project.
- Click the new project button.
- Provide a name and a description for the project on the next page, and press submit.
- Verify that your new project shows up on the project page list.
- Click on the new project and go to the project page. Verify that there are no crawls, models, or datasets yet.
Project Settings
Click the “pencil” icon next to the name of the project on the project overview page.
- Supply a different name and description for the project, and hit “submit”.
- Verify that the project was edited successfully by checking the success message at the top of the page.
Go back to the settings page.
- Click on the “trashcan” icon. Verify that there is a popup asking you whether you want to delete the project.
- Click on the trash icon and click yes.
- Verify that you are taken to the landing page, and that there are no projects listed on the landing page.
Testing Indices
Index Creation
Create a new project.
Click on the “Add Index” button either in the sidebar or under the list of indices on the project page.
- Add an index. Give the index a name and a zip file. There are two zipfiles in the repository to use, located at “source/resources/test_resources”. Click submit.
- Verify that the index was added successfully by checking for the success message at the top of the page.
- Verify that the index was successfully created by checking the status next to the name of the index.

Index Settings
Click on the link to the index on the project overview page. This will take you to the index settings page.
- Supply a new zipfile for the index creation. Use the zipfile that you did not use earlier – “sample2.zip” if you earlier used “sample.zip”.
- Verify that the index was updated successfully by checking the indices list.
- Verify that the new files were added to the newly created index.
Return to the index settings page and click the “trashcan” icon. As before, confirm that the cancel button works, and then delete the index.
- Confirm that the index was deleted successfully by looking at the list of indices on the project overview page.
Testing Seeds
At the navbar, click on the “Seeds” tab.
- Create a Seeds List
- Create a seeds list by providing a file.
- Create another by pasting URLs into the textbox.
- Paste in invalid URL into the textbox, and verify that it is highlighted red.
- Edit a seeds list
- Click on the icon for the seeds list to access the edit seeds page.
- Remove some URLs and click “Reset” to return to the original seeds list.
- Make one of the URLs invalid, and press “Save”
- Verify that the invalid URL is highlighted with red.
- Fix or remove the URL and click “Save”
Testing Crawls
Testing Nutch Crawls
Included with the repository is a test seeds file. You can use this file to testing of nutch and ache crawls. The seeds file is located at “source/test_resources/test_crawl_data/cats.seeds”.
From the project overview page, click the Add Crawl button on the list of crawls or in the sidebar dropdown.
At the add crawl page, supply a name and description.
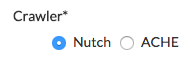
- Make sure that the “nutch” option is selected.
- Select one of the previously created seed lists and create the crawl.
Verify that the crawl has been added successfully to the crawls list table.
Go to the crawl page by following the link in the crawls list table.
- Verify that the crawl status and available buttons are the same as in this image.
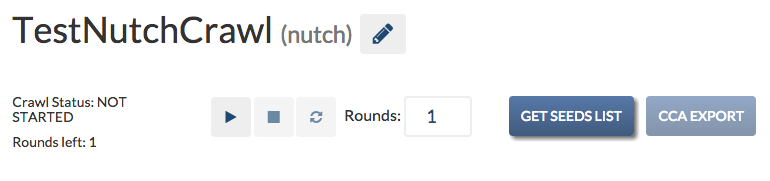
- The following buttons should be available: “Start Crawl”, “Get Seeds List”. All other buttons should be greyed-out.
- The crawl status should be set to NOT STARTED with 0 rounds left to crawl.
Start a crawl and verify that the crawl completes successfully.
- When you start the crawl, there should be two rounds left.
- At the end of the first round, summary statistics should list total pages crawled as between 6 and 9.
- After the first round is done, the status should show “SUCCESS” before going onto the next round.
- On the start of the next round, the crawl status should change to “STARTED”
- At the end of the second round, the rounds left should be zero.
- The pages crawled should be between 300 and 400.
Test Crawl Settings
On the crawl page, click the “gears” icon to access the settings.
- Change the name and description of the crawl, and submit.
- Click the “trashcan” icon to delete the crawl.
- Hit cancel on the popup first, and then delete the crawl.
- Verify that you are brought to the project overview page.